One of the new features on Github is code review. Here you can go in and add comments to specific code lines.
English
🇬🇧 English articles and tutorials.
-
Part One: Adobe Animate and API
Do you want to fetch data from an API and use the data in your Adobe Animate CC creative work? Animate CC productions are made by JavaScript and HTML canvas. In theory getting data should work.
Let’s try!
OpenWeatherMap
The data from OpenWeatherMap is only available when you have a token. The first step is to create a user profile, and then to create a token. Then you can create the URL to fetch the weathere data.

Above you see the API call. That’s the information we need in order to get data from the website. The data will be returned as JSON, but we can fetch the content and display it in Adobe Animate. You can create the string along these lines:
var weather = 'https://api.openweathermap.org/data/2.5/weather?q=YOUR-CITY-HERE&appid=ADD-YOUR-TOKEN-HERE';The url will fetch data from the API in the form of JSON. The URL for the weather data is formed in the variable weather.
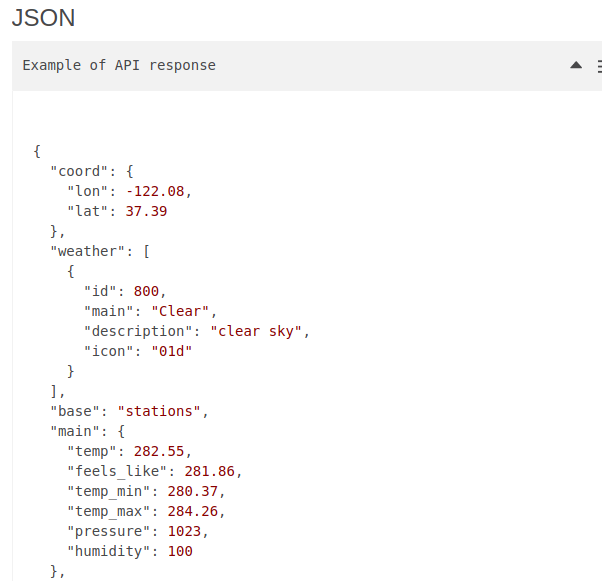
A JSON object from OpenWeatherMap. The fetch() function will use the variable above, and that’s how we get the data for the JavaScript into the document:
fetch( weather ).then( ... etc ... );Dynamic Texts
Now we have the data. Then we want to use the data in the design. Here we will work with Dynamic Text Fields.

Here the Dynamic Text Field is selected. In Propterties to the left it is named theCity. Now we can change the content dynamicly with JavaScript. On the stage you see two Dynamic Textfields called theDescription and theCity. If you want to change the text of these fields you could do it like this:
_this.theCity.text = “Hello World”;
But we need the text from the API. If you check out the content of the weather data in the console, you can see, that the name of the city is:
data.name
The city name is added to the Dynamic Text Fiels like this:
_this.theCity.text = data.name;
If you use the Inspect Tool in the browsesr you will be able to create Dynamic text fields for all the data in the object from OpenWeatherMap.
The JavaScript
In the actions layer you can add your Vanilla Javascript. Here is the script I used:
/**
 * OpenWeatherMap API Demo
 * IMPORTANT
 * Don't use the code beautifier. It will ruin the => in the Js.
 **/

// get this as a global var
var _this = this;

// Openweather API string
var weather = 'https://api.openweathermap.org/data/2.5/weather?q=Aarhus&appid=ADD-YOUR-TOKEN-HERE';

// get the weather data via query URI
fetch(weather).then( response=>{

	return response.json();

}).then(data => {

	// JSON data to the console for inspection
	console.log(data);

	// add the weadther description,texts or images to theDescription
	_this.theDescription.text = data.weather[0].description;
	_this.theCity.text = data.name;

}).
catch (err => {
	// Do something for an error here
	console.log('There was an error.');
});
Now you can test the production. Use the inspection tool in order to use the data from the JSON object in Dynamic Text Fields.
So that’s what it takes if you want to create an Adobe Animate production that can display data from OpenWeatherMap’s API. Of course you can work in a similar manner with other API’s and JSON objects.
Display the Weather Forecast in WordPress
In order to show your work in WordPress, you can use an iframe. Upload your production to a folder on your server. Then add am iframe along these lines:
<iframe src="https://yoursite.net/yourFolder/weather.html" height="480" frameborder="0" style="overflow=hidden;"></iframe>When you upload your work you’ll need the HTML, JavaScript file and the images/ folder – of course with the images in the folder. You don’t need the .fla file, since it’s for production only, but I would recommend to put it there anyway. If you want to change anything, you’ll know where it is.
Resources
-
Part Two: Adobe Animate and API
Here is the second part of my tutorial about Adobe Animate and the OpenWeatherMap API. In the previous article we got texts from the API. Now we want graphical symbols for the weather conditions. If we have a thunderstorm in Aarhus, then the app skould display a thunderstom symbol.
In this variation of my weather app the weather conditions are visualized in a movie. Each frame in the movie has a weather symbol inspired by the symbols from Openweathermap.
On the movie each frame is named after one of the weather conditions from OpenWeatherMap. The movie instance on the stage is named weatherConditions.
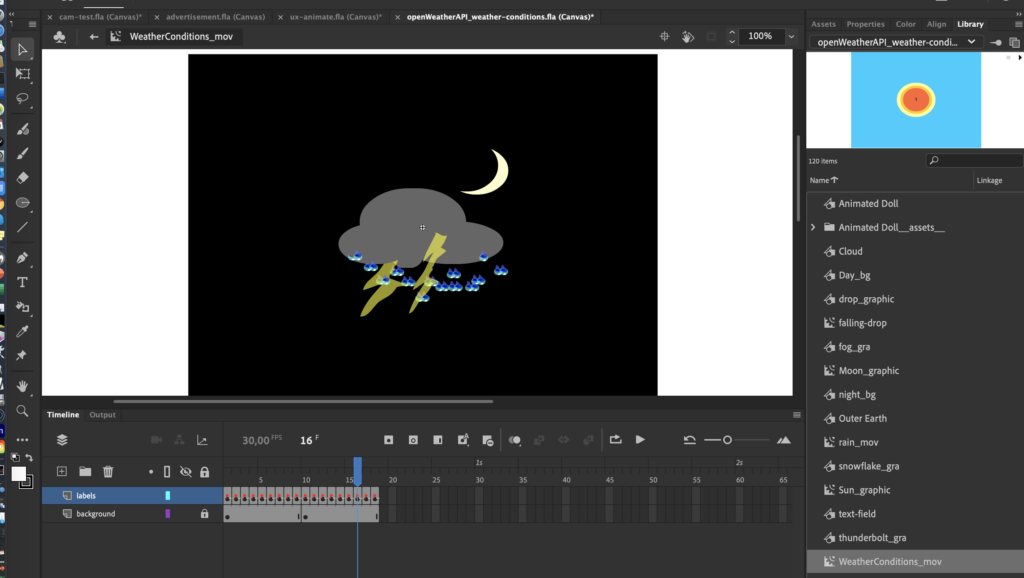
A weather condition.The thunderstorm has animated raindrops. Each frame in the weather condition movie has a label. The API can return 18 weather conditions, here are the labels:
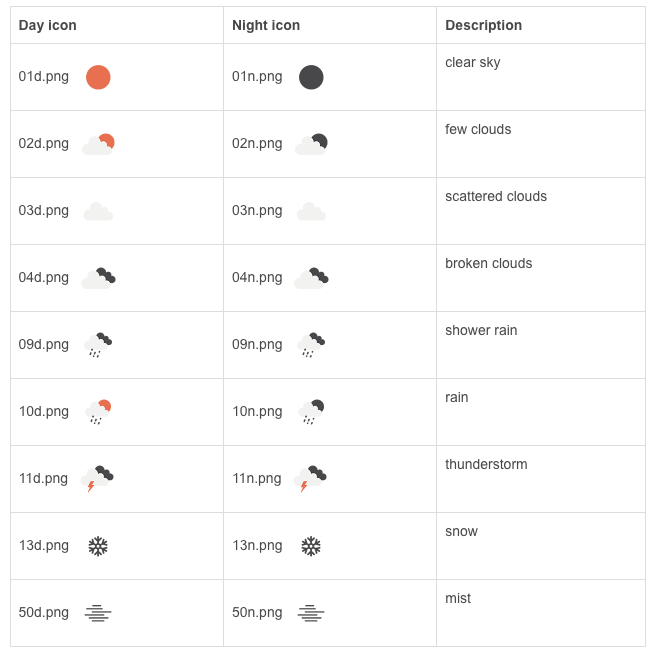
Symbol Day Night Clear Sky 01d 01n Few Clouds 02d 02n Scattered Clouds 03d 03n Broken Clouds 04n 04n Shower Rain 09d 09n Rain 10d 10n Thunderstorm 11d 11n Snow 13d 13n Mist 50d 50n Weather conditions returned by OpenWeatherMap. The API could return something like “11n”. That would be a thunderstorm during the night, because the d and n after the numbers refer to day or night. Hence we have nine weather conditions with day and night graphics.
So we need a movie with 18 frames. Nine for the day. Nine for the night. Each frame shall have a label name. Then you can create JavaScript commands that will “go to a label and stop there”.
Since we know the name of the symbol, the weather condition will be displayed by a simple gotoAndStop command:
_this.weatherConditions.gotoAndStop( data.weather[0].icon );
// the api will return something like: 03d
Of course each frame could be animated ad libitum. You could add a movie clip with proper weather conditions to each of the frames. But now we have the skeleton for either a weather forecasst supported by an API.
This sample will open doors to the fascinating world of APIs. Now you know how to use Adobe Animate with APIs – and you can create movies controlled by the data returned from your favorite APIs.
If you have created something similar – let me know, and share your link. Post a comment below.
Here are the symbols from OpenWeatherMaps’ pages.
-
Interactive animation made with Adobe CC. Transitions via the camera feature.
- Sample file: click here to download.
-
Here are the slides from my E-Alumni talk at Business Academy Aarhus November 4rd 2020

The Trends
- A) Trends in CMS usage with focus on WordPress 2020 – 20201.
- B) Blockbuilders – the situation where Gutenberg is integrated in the WordPress Core.
- C) Twentytwentyone under deveopment here and now. What can we expect from the next generation of WordPress themes?
The Slides
Here are the slides from my presentation. The live code session happened IRL, but you can get an idea of the code in the sample below.
Sample code
How to create your own Patterns for Gutenberg is a well kept secret. In due time I guess that you’ll be able to create the Patterns via a button. But in the present version of WordPress you’ll have to write some code. Here is a plugin, but you could do something similar in the child theme’s functions.php.
-
Wow what a wonderful drop of whisky!
I found this lovely blended whisky on a trip to Sønderborg. Buying whisky at the hotel is kind of expensive, som I went to a local whisky expert. He recommended this bottle.
To be honest I was sceptic. Normally I prefer single malts. And this one was blended. If I was blindfolded I’d probably asume that this whisky was more expensive.
Douglas Lang’s Big Peat is a wonderful drop of whiskey. Recommended for amazing sunsets and for a wee drop late at night.

Verdict: ★★★★ of five stars. -
Often onepager menus fail. They work all right on the frontpage. But other pages will not load the page correctly.
Let’s say that we want a link, that should point to this ID deep below on your onepager:
<div id="myId"></div>On a typical WordPress onepager you may be tempted to link like this:
<a href="#myId"> Somewhere deep below </a>Or from the menu:
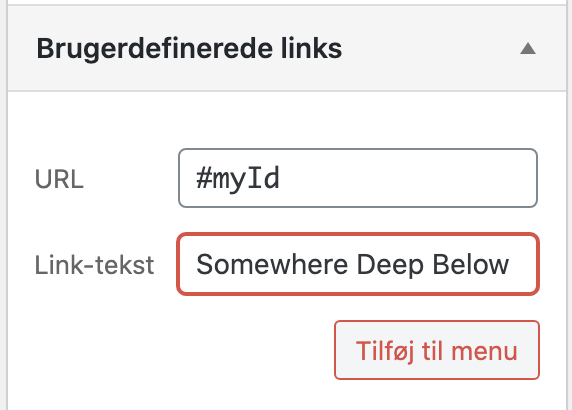
This code will work from your WordPress menu as long as you’re on the same page or post as these IDs. But when you navigate to other pages these links will not work at all. Because the ID myId is not found on the new page.
The cure is simple. Don’t link to internal IDs as above. Use the full path to your website in the WordPress menu, do like this:
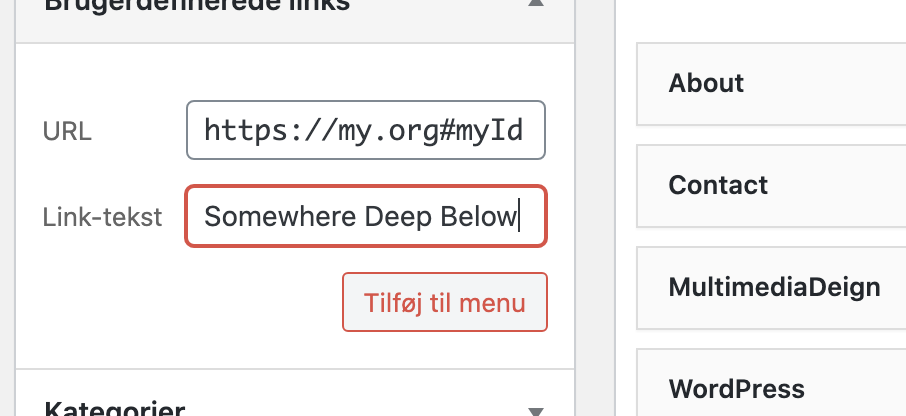
Do this with all the IDs on your page. Then the links in your menu will work from pages and posts.
-
One line of code. That’s all you need in order to get your sandbox. Developers often need a place where the can experiment with design ideas or Minimal Viable Productions. This tutorial will show you how to do this.
- Download WordPress from https://wordpress.org/download/
- Unzip the files.
- Delete the file wp-config-sample.php
- Download the file wp-config.php from your WordPress on your web host.
- Edit wp-config.php in your favorite editor.
If you have WordPress up and running the settings in wp-config.php will be almost the same. But you have to change one line of code, if you want to run more than one WordPress installation on your web host.
wp-config.php
Find this line:
$table_prefix = 'wp_';

// change this line to:

$table_prefix = 'sandbox_';
If you need more WordPress on your web host, just change the table prefix every time.
More about edition the wp-config read this page.
-
WP: Fall 2020
Here is a guide to WordPress 5.5. This version is just released by WordPress (august 2020). We have a brand new block editor with exciting features.

What’s new in WordPress 5.5?
By now WordPress is skipped with a fantasctic block editor. Some even predict that the days of mighty Elementor and other competing block editors are counted. You don’t need a plugin in order to create fantastic content. Now WP is faster and more easy to use than ever before. Creating content isn’t harder than using Libre Office.
WordPress will load faster, and images will load “lazy”. Here is a guide to WordPress with tutorials ranging from installation of WordPress on your web host to advanced features on costum made pages – and themes. If you know your HTML and CSS knowledge about a content managing system is the next logical step.
Advanced Tweaks
If you want to tweak a theme and create some advanced stuff that the theme was not meant for you still may to do this in either PHP or use JavaScript with the WordPress REST API. If something is possible in HTML then you can certainly do it in WordPress. That is if you know how to.
Tutorials
Below you will find my WordPress 5.5 for Multimedia designers.
Install WordPress
If you don’t have WordPress on your webhost yet: here is a tutorial. Follow the step by step tutorial and pause the video while you install.
The host I use in the video is One.com. Of course this is only a sample.
Since I use One.com there is a discount offer for you here (and the discount will give me a similar discount too so you will support Multimusen too).
You can follow the steps on other hosts too. So if your website is on say Unoeuro or something else – just follow the steps of the tutorial.
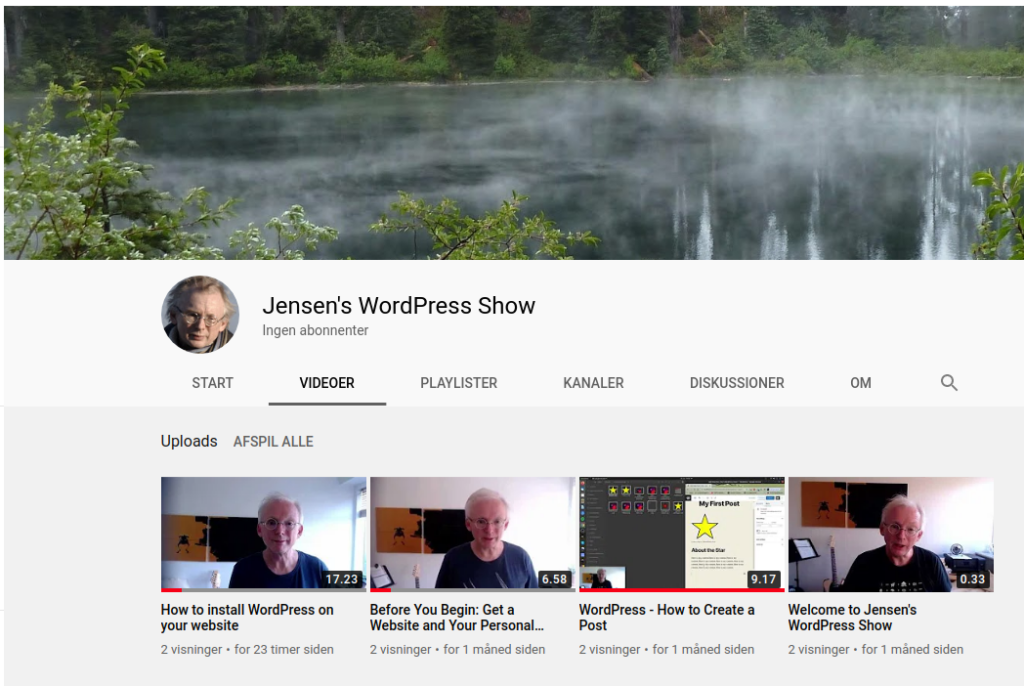
Jensen’s WordPress Show: Follow the new trends on WordPress Jensen’s WordPress Show
Here is Per’s new WordPress channel on YouTube where you will find more and more videos about WordPress. If you follow my channel you’ll know about the latest trends right away.
Create a Post
JavaScript in Gutenberg
Multimedia designer often add interactive UX elements such as small animations via JavaScript.Use the custom HTML block element. Add your script like this:
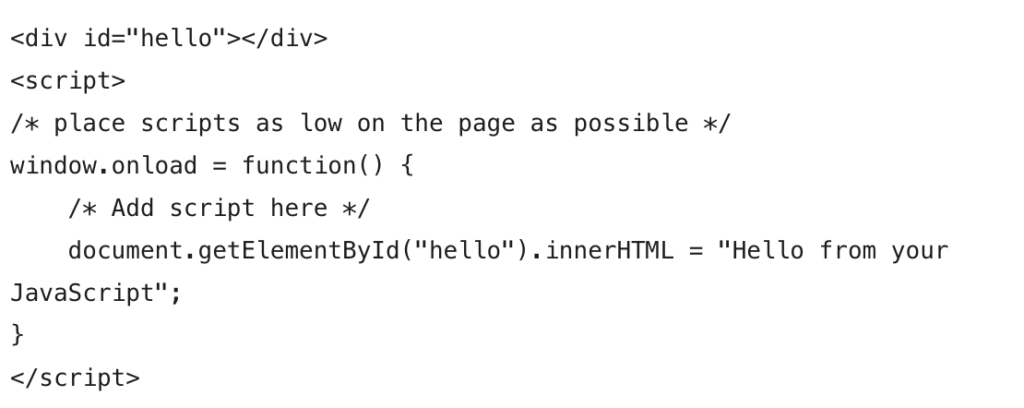
You have to use window.onload = function( ){ } in order to check that all elements are loaded. Just add whatever scripts you have inside that function. If you use document.getElementById without the window.onload your script will not work.
The Child Theme
Why use Child Themes?
Use a child theme if you want to tweak the theme with your own code or stylesheets. If you change the code in a theme and update to a new version your changes are lost. The changes you make in a child theme are your own.
Create a Child Theme
Here is a quick guide to child themes. First you have to create a child theme. Follow the steps in thies tutorial.
Add Widgets to Your Child Theme Frontpage
If you choose a static frontpage for WordPress your theme will use the template file front-page.php. In the next tutorial I will add a few wdget areas to the frontpage.
A Living Document
Per’s guide to WordPress 5.5 is a living document. During the fall of 2020 I will add more tutorials from my WordPress classes at the Business Academy Aarhus to this page. Eventually you will find tutorials about:
- Themes
- Child themes
- Costum pages
- Recommended Plugins
- SEO
- WordPress Securitu
Have fun: Code is Poetry.
More About WordPress
Did you know: There are more than 50 articles in the WordPress category on Multimusen.dk.
-
Murat Kilic is one of our fellow senior lecturers at Business Academy Aarhus. He is a WordPress expert, and his video will help new WordPress users in many ways.
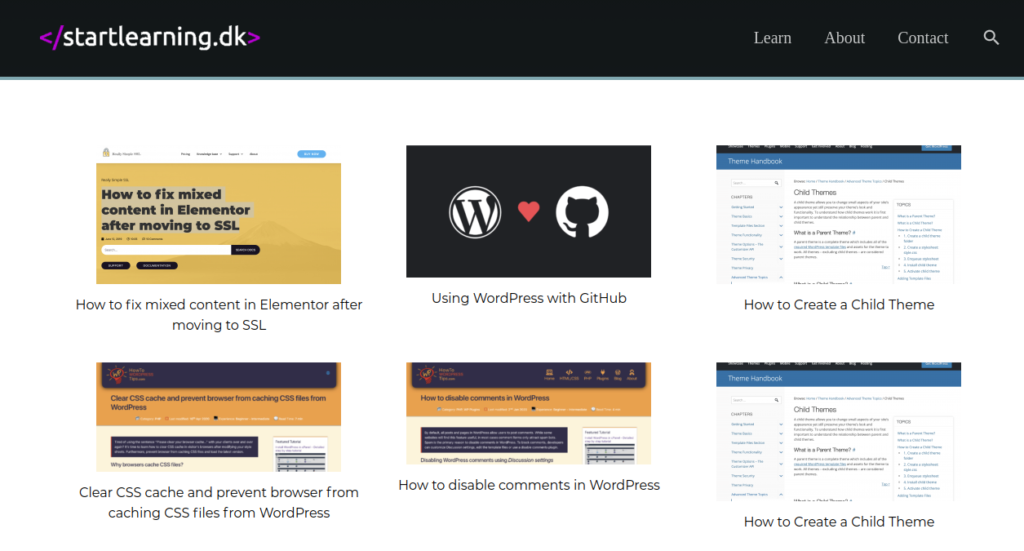
On Murat’s </ startlearning > there are plenty of cool guides to WordPress tweaks. On </ startlearning > you will find Murats videos and tutorials about WordPress tweaks.
Here are a few of Murat’s tutorials:
Install WordPress on UnoEuro
-
Next semester I will teach Adobe Animate and integrate the animations with WordPress. In this blog I will collect resources and tutorials as a preparation for the next semester’s UX classs for Multimedia Designers.
Tutorials Adobe Animate
“RubberNinja’s” tutorial is an introduction to the basic user interface (UI):
The next tutorial by “TipTut” with almost one hour of basic instruction. This is a good starting point, if you use Adobe Animate for the first time. It’s a quite long video, but you’ll get an idea of the animation workflow.
For those of us who knew Adobe Flash (killed by Steve Jobs a few years before his death): the workflow in Adobe Animate is almost the same.
Next steps:
- Export to HTML canvas via Adobe Animate
- Create a WordPress costum page
- Implement the resulting code in WordPress
- Enqueue scripts
Codewise you’ll see that knowledge of JavaScript is an advantage. Probably I’ll have to create some video tutorials about this on my YouTube channel.
Animation Theory
12 Principles of Animation
Sources
Williams, Richard: Animator’s Survival Kit (2012)


